A DIY home alarm system lets you protect your home by installing door sensors, motion detectors, a control hub, and other security devices yourself. Unlike professionally installed systems, DIY options allow you to choose your equipment, manage installation, and decide whether you need professional monitoring.
The right setup depends on your home’s layout, budget, internet connection, and preferred security features. You can begin with a basic wireless kit and add compatible devices as your needs change.This guide explains how to choose a DIY home alarm system, install and test its components, compare monitoring options, understand installation costs, and check compatibility with Amazon Alexa. It also explains what to look for when a provider advertises a free home alarm system.
What Is a DIY Home Alarm System?
A DIY home alarm system is a security setup that you purchase, install, and manage yourself. Many modern systems use wireless sensors that communicate with a central hub or base station. When a sensor detects an event, the system can trigger an alarm or send a notification, depending on its configuration.
Some systems support smartphone alerts, indoor sirens, security cameras, and professional monitoring. Others integrate with smart home platforms such as Amazon Alexa, although compatibility and available functions vary by manufacturer. Explore Ring Alarm’s performance, smart features, pros, cons, and home security value.
A typical DIY alarm system may include:
- Control hub or base station: Connects compatible security devices and manages alarm activity.
- Door and window sensors: Detect when a protected entry point opens.
- Motion detectors: Detect movement in selected indoor areas.
- Keypad or smartphone app: Lets you arm and disarm the system.
- Indoor siren: Sounds an alert when the system detects a configured alarm event, if supported.
- Security cameras: Provide video footage of selected areas.
- Backup power: Keeps supported components operating during certain power interruptions.
You do not need every component. An apartment may require only a few entry sensors, while a detached house with several exterior doors may benefit from additional sensors and motion detectors.
Is a DIY Home Alarm System Worth It?
A DIY home alarm system can offer a practical balance of affordability, flexibility, and control. You choose the equipment, install it at your own pace, and decide whether professional monitoring is worth the recurring cost.However, DIY security is not always cheaper over the long term. Equipment, extra sensors, replacement batteries, cloud video storage, cellular backup, and monitoring subscriptions can increase the total expense.
| Feature | DIY alarm system | Professionally installed system |
| Installation | You install the equipment | A technician handles installation |
| Upfront cost | Depends on the kit and equipment | May include professional installation charges |
| Equipment choice | Depends on the manufacturer’s compatible devices | Depends on the provider’s equipment |
| Monitoring | Self-monitoring or paid monitoring, depending on the system | Depends on the provider and service plan |
| Maintenance | You handle testing and routine upkeep | Service options depend on the contract |
| Best for | People comfortable with basic setup | People who prefer professional assistance |
A DIY system may be suitable if you can follow setup instructions, have reliable connectivity when required, and are willing to maintain the equipment.Professional installation may be a better option for complex properties, hardwired systems, or homeowners who do not want to handle setup and troubleshooting themselves.
How to Choose the Right DIY Home Alarm System
Before buying a security kit, decide which areas need protection and how you want the system to respond when a sensor detects activity. More devices do not necessarily provide better protection if important entry points remain uncovered.
Identify the Entry Points You Need to Protect
Start with exterior doors, accessible windows, garage entrances, and basement doors. Consider any other accessible entry points around your property.Draw a simple floor plan and mark where you want to install sensors. This will help you select an appropriate starter kit and avoid purchasing unnecessary equipment.
Choose Between Wireless and Wired Systems
Wireless alarm systems are often easier to install because their sensors communicate with a hub without requiring dedicated sensor cables. Many use batteries and attach with screws or manufacturer-approved adhesive.They can be suitable for apartments, rental properties, and houses where you want to minimize drilling.Wired systems may suit homes with existing security wiring. However, installing new cables can be more complicated and may require a qualified professional.
Decide Whether You Need Professional Monitoring
Self-monitoring means you receive alerts and decide how to respond. Professional monitoring uses a service that handles alarm events according to its plan, which may include contacting emergency contacts or emergency services when appropriate.
Before choosing a plan, check:
- Whether smartphone notifications require a paid subscription.
- Whether the system includes an audible siren.
- Whether battery and cellular backup are available.
- Whether professional monitoring is offered in your area.
- Whether the plan supports your chosen devices.
- What happens when the internet or power goes out.
Do not assume that every alarm automatically contacts the police or emergency services. Confirm the provider’s response procedures, service limitations, and any local requirements.
Check App Support and Smart Home Compatibility
If you already use smart home equipment, look for an alarm system that supports your preferred platform.Some compatible systems integrate with Amazon Alexa for selected voice commands, announcements, or routines. The available functions depend on the alarm model, integration method, and service plan.An Echo speaker alone is not a replacement for a dedicated alarm system. Verify that the exact alarm model supports the functions you want before purchasing it.
Compare the Total Cost
Calculate the equipment price alongside any recurring charges. Include additional sensors, cameras, cloud storage, cellular backup, replacement batteries, and monitoring fees where applicable.A small apartment may need only a starter kit and a few entry sensors. A larger property may require additional devices or range extenders.Compare the total cost over the period you expect to use the system instead of choosing solely by the advertised starter price.
What Equipment Do You Need for DIY Home Alarm Installation?
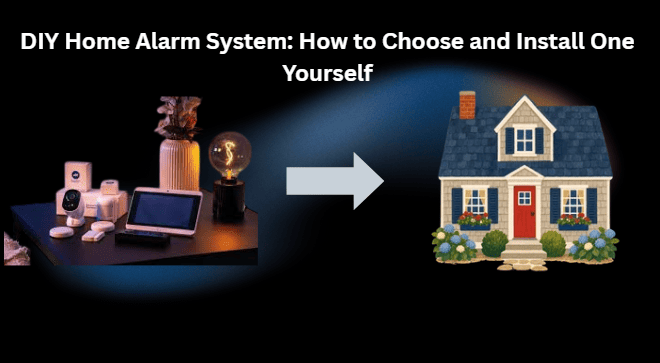
Most wireless alarm kits require only basic household tools, although the exact requirements vary by model.
| Equipment | Main purpose | When you need it |
| Base station or hub | Connects compatible sensors and manages alarms | Required by hub-based systems |
| Contact sensors | Detect opened doors and windows | For selected entry points |
| Motion detectors | Detect movement indoors | For additional room or hallway coverage |
| Keypad | Provides physical alarm controls | If included or preferred |
| Smartphone | Configures devices and receives notifications | For app-managed systems |
| Batteries | Power wireless sensors | As specified by the manufacturer |
| Screws or mounting tape | Secure devices | Depending on the mounting method |
| Screwdriver and measuring tape | Help with installation | If required by the kit |
Some kits include all the equipment needed for basic installation, while others sell additional sensors separately. Check the package contents before ordering.
How to Install a DIY Home Alarm System Yourself?
Most wireless alarm systems follow a similar process: prepare the equipment, configure the base station, pair the sensors, mount the devices, and test the complete setup.The following instructions describe a typical installation. Always follow the manufacturer’s guide for your exact model, especially when pairing devices or testing a monitored alarm.
Prepare Your Home and Equipment
Before installing anything, read the manufacturer’s instructions and confirm that all components are compatible.
- Download the manufacturer’s official app from the Apple App Store or Google Play, if required.
- Check your Wi-Fi connection and have your network password ready.
- Enable Bluetooth if the installation process requires it.
- Identify the base station, contact sensors, motion detectors, keypad, and mounting accessories.
- Plan where each component will be installed.
- Check the manufacturer’s recommendations for sensor placement and wireless range.
Prepare the equipment before attaching devices permanently. This makes it easier to correct placement problems during setup.
Set Up the Base Station
The base station connects compatible sensors and coordinates alarm activity. Place it in a suitable indoor location where it can communicate with the devices and connect to the required network.
- Place the base station on a stable surface or mount it as directed.
- Connect the supplied power adapter.
- Connect Wi-Fi or Ethernet, depending on the model.
- Open the manufacturer’s app and sign in or create an account.
- Select the option to add a new security system or base station.
- Follow the on-screen instructions to pair the device.
- Wait for the app to confirm that setup is complete.
Choose a location with reliable connectivity and adequate sensor coverage. If the base station has a built-in siren, consider whether its sound will be audible throughout the areas you want to protect.
For example, Ring’s official instructions explain how to add a Ring Alarm Base Station through the Ring app and configure compatible devices. Its exact menus and pairing steps may differ from those of other manufacturers.
Official reference: Ring Alarm Base Station setup guide.
Pair the Door and Window Sensors
Contact sensors commonly consist of a sensor and a magnet. When a protected door or window opens, the two parts separate and the system detects the change.
- Open the app’s device setup menu.
- Select the option to add a contact sensor.
- Activate the sensor when the app or manual instructs you to do so.
- Assign a clear name, such as Front Door, Kitchen Window, or Garage Entry.
- Position the sensor and magnet according to the specified alignment and spacing.
- Secure the components using the approved mounting method.
- Open and close the door or window to check that the sensor reports the correct status.
Avoid placing sensors where normal movement can knock them loose or where the door frame prevents proper alignment.Test each device before relying on it for security. Do not assume that a sensor is working simply because the app shows it as connected.
Install the Motion Detectors
Motion detectors provide additional coverage in selected rooms and hallways. Their performance depends on the device’s detection range, mounting position, and the layout of the room.
- Choose a location recommended by the manufacturer.
- Check the recommended mounting height and detection angle.
- Avoid pointing the detector directly at areas that may cause unwanted triggers, such as moving curtains or certain heat sources.
- Secure the detector using the supplied bracket, screws, or approved adhesive.
- Run the manufacturer’s placement or motion test, if available.
- Adjust the position if the detector misses movement or triggers too easily.
If you have pets, check whether the detector supports pet-tolerant settings. These features may reduce some false alarms, but they do not guarantee that pets will never trigger a sensor.
Configure the Keypad and Alarm Modes
Many alarm systems offer Home and Away modes, although their behavior varies by model and configuration.
Home mode may keep selected sensors active while allowing people to move around inside. Away mode may arm a broader selection of devices when everyone leaves.
- Install the keypad in an accessible location if your kit includes one.
- Configure entry and exit delays according to the manufacturer’s instructions.
- Select which sensors should remain active while you are home.
- Create a strong, unique account password.
- Set a secure alarm PIN where supported.
- Enable available account security features, such as multifactor authentication.
- Review the notification settings and confirm how the system reports alarm events.
Keep your PIN private and avoid using an obvious number. Review shared account access regularly and remove access for people who no longer need it.
Test the Entire System
Testing is an essential part of home alarm installation. Confirm that every sensor responds correctly and that the system reports problems when they occur.
- Follow the manufacturer’s test procedure before triggering any alarm.
- Open each protected door and window to check the corresponding sensor.
- Test motion detectors using the recommended procedure.
- Confirm that the app displays the expected status changes.
- Test the siren using an approved test mode, if available.
- Check the system for battery warnings, connectivity problems, and other faults.
- Confirm that notifications reach the intended phone or device.
- Restore the system to its normal operating state after testing.
If you use professional monitoring, follow the provider’s specific test procedure before triggering a monitored alarm. Contact the provider if you are unsure how to avoid an unnecessary dispatch.
Can You Get a Free Home Alarm System?
A free home alarm system offer may reduce the upfront cost of equipment, but it does not necessarily mean the entire service is free.Some providers advertise equipment at no additional upfront charge when customers sign up for a monitoring plan or accept other service terms. The actual arrangement varies, so read the offer carefully before agreeing.The Federal Trade Commission provides guidance on recognizing misleading home security offers and avoiding high-pressure sales tactics.
Official reference: FTC guide to avoiding home security scams.
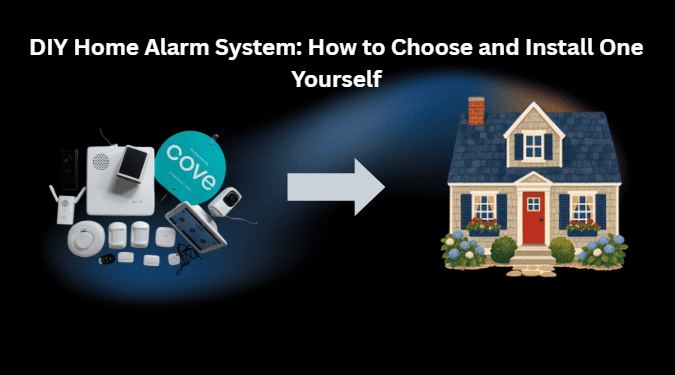
What to Check Before Accepting a Free Alarm Offer?
- Equipment ownership: Confirm whether you own the equipment or must return it when the service ends.
- Monthly monitoring: Check the recurring fee and any minimum contract period.
- Cancellation terms: Review early termination charges, refund conditions, and return deadlines.
- Installation fees: Ask whether activation, setup, or technician visits cost extra.
- Additional charges: Check for cellular backup, cloud storage, replacement equipment, and other service fees.
- Included features: Confirm which functions remain available if you cancel a subscription.
If you want to avoid monthly monitoring fees, compare self-monitored systems that provide the local alarm functions and app features you need without a recurring monitoring plan.However, do not assume that all app features, remote alerts, video storage, and backup communication remain available without a subscription. Verify the terms for your chosen model.A free equipment promotion is not automatically a scam, but the written terms matter more than the headline offer.
How Much Does DIY Home Alarm Installation Cost?
The total cost of DIY home alarm installation depends on the equipment you choose, the size of your property, and the services you use.
Rather than relying on a single advertised price, calculate your expected spending using the following categories.
| Cost category | What to include |
| Starter kit | Base station, keypad, and included sensors |
| Extra sensors | Additional doors, windows, and motion detectors |
| Cameras | Camera hardware and any required video subscription |
| Installation supplies | Mounting hardware, batteries, and necessary tools |
| Monitoring | Monthly or annual service charges |
| Backup options | Cellular service and backup batteries, where supported |
| Maintenance | Replacement batteries and damaged equipment |
Check the manufacturer’s current US pricing before buying. Equipment prices, promotions, and subscription features can change, so an advertised starter price should not be treated as the complete cost of ownership.For a budget-conscious setup, begin with the entry points that matter most and expand after testing the initial installation. Avoid paying for cameras or premium services unless they address a specific security need.If you are comparing multiple systems, calculate the estimated cost over the same period and include any mandatory subscriptions. This provides a more useful comparison than looking at equipment prices alone.
How to Connect a DIY Alarm System to Amazon Alexa
Some compatible alarm systems integrate with Amazon Alexa, allowing selected controls, announcements, or routines through the Alexa app and supported Echo devices.However, compatibility does not mean that every alarm function can be controlled by voice. The available features depend on the specific alarm, the manufacturer’s integration, and any required subscriptions or account permissions.Before connecting your equipment, check the manufacturer’s compatibility information and Amazon’s official instructions.
For a compatible device, the general process is:
- Open the Alexa app on your phone.
- Select Devices.
- Tap the plus icon and choose Add Device.
- Select the appropriate device type and brand.
- Follow the on-screen instructions.
- Enable the required skill or link the manufacturer’s account if prompted.
- Test the supported functions and review the system’s security settings.
The exact steps may differ depending on the device and connection method.
Use voice control only for functions officially supported by the manufacturer. If disarming by voice is available, check whether an access code is required and whether voice access is appropriate for your household.An Echo speaker alone is not a substitute for a dedicated alarm system with appropriate sensors. Do not rely on Alexa integration as your only means of detecting or responding to an intrusion.
Common DIY Home Alarm Installation Mistakes
Even a good security kit can leave gaps if sensors are poorly positioned or the system is not tested properly. Avoid these common mistakes during installation.
Installing Sensors in the Wrong Places
A poorly aligned contact sensor may fail to register a door opening. Follow the manufacturer’s alignment and spacing instructions, then test every protected entry point.Motion detectors can also miss movement if they are installed outside their recommended detection area.
Ignoring Wireless Signal Problems
A sensor may pair successfully but struggle to communicate reliably from its final location. Check the signal strength and run any placement test provided by the manufacturer before securing the device permanently.If necessary, reposition the sensor or use a compatible range extender.
Forgetting Battery and Power Backup
Wireless sensors rely on batteries, while a base station may require mains power and a backup battery. Check the battery status regularly and understand which functions remain available during an outage.Backup power does not automatically guarantee internet connectivity or remote notifications.
Relying Only on Smartphone Notifications
A phone may be muted, offline, or unavailable when an alert arrives. Consider an audible siren, supported backup communication, or professional monitoring if those options suit your needs.Understand the limitations of each notification method before relying on it.
Skipping Routine Tests
Installation is only the beginning. Test sensors according to the manufacturer’s recommendations, update the app and device firmware, and investigate warnings rather than ignoring them.Regular checks can help identify low batteries, communication failures, and devices that need repositioning.
Overlooking Account Security
An alarm system is connected to your home security, so protect the account that manages it.Use a unique password, enable multifactor authentication where available, keep software updated, and review shared access. Avoid sharing alarm PINs or account credentials unnecessarily.
Frequently Asked Questions
Can I install a home alarm system myself?
Yes. Many wireless home alarm systems are designed for DIY installation and provide app-guided setup. Wired systems or installations involving electrical work may require additional skills or a qualified professional.
Is there a free home alarm system with no monthly fee?
Some systems let you purchase the equipment and use selected local alarm functions without paying for professional monitoring. Other features, such as remote access, video storage, or cellular backup, may require a subscription. Check the terms for the exact model before buying.
Do DIY home alarm systems work without Wi-Fi?
Some systems can detect an event and sound a local alarm without an internet connection, but remote alerts and app access may stop working. Cellular backup or other communication options may be available on selected models, sometimes for an additional fee. Check the manufacturer’s documentation to understand what continues to work during an outage.
Can I use Alexa as a home alarm system?
Alexa can interact with certain compatible security systems, but an Echo device alone does not provide the same protection as a dedicated alarm with appropriate sensors. Check the supported features of your alarm brand before relying on Alexa for security functions.
Are DIY alarm systems suitable for apartments?
Yes. Wireless systems can work well in apartments, especially when the mounting options suit the property. Check your lease, avoid damaging walls or frames without permission, and choose equipment that covers the entry points you need to protect.
Final Thoughts
The best DIY home alarm system is one that covers your important entry points, fits your budget, and provides the alerts or monitoring you need. Before purchasing, compare equipment compatibility, installation requirements, subscription costs, and backup options.